

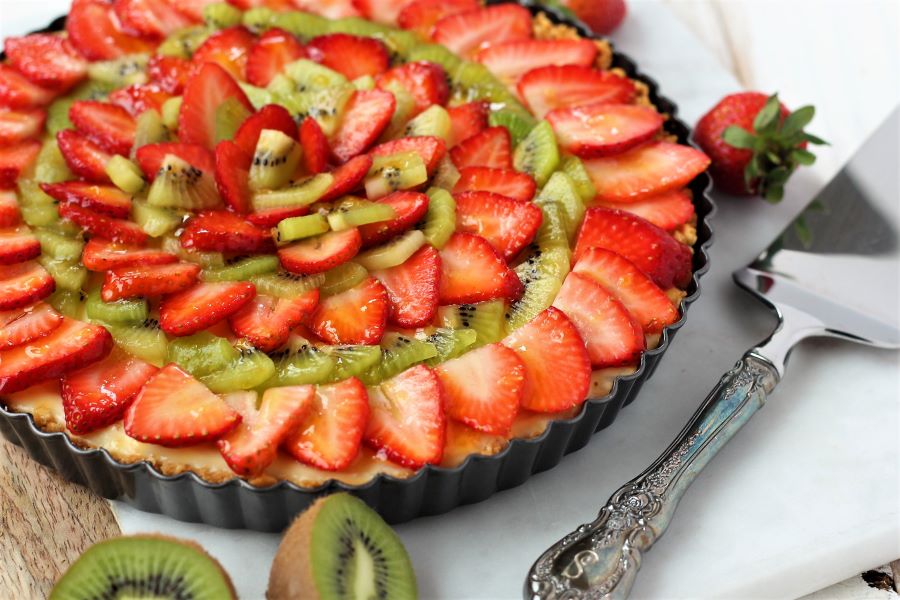
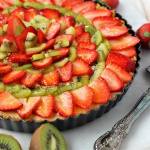
Strawberry Kiwi Cream Cheese Tart
This Strawberry Kiwi Cream Cheese Tart was inspired by our March Cookbook Club recipe of the month. It’s so easy to make, and SO delicious I just had to share a version of it with you. Cookbook Club’s version is a citrus sweet and salty situation. I absolutely LOVE a fruit tart, so went sweet and fruity with strawberries and kiwi.
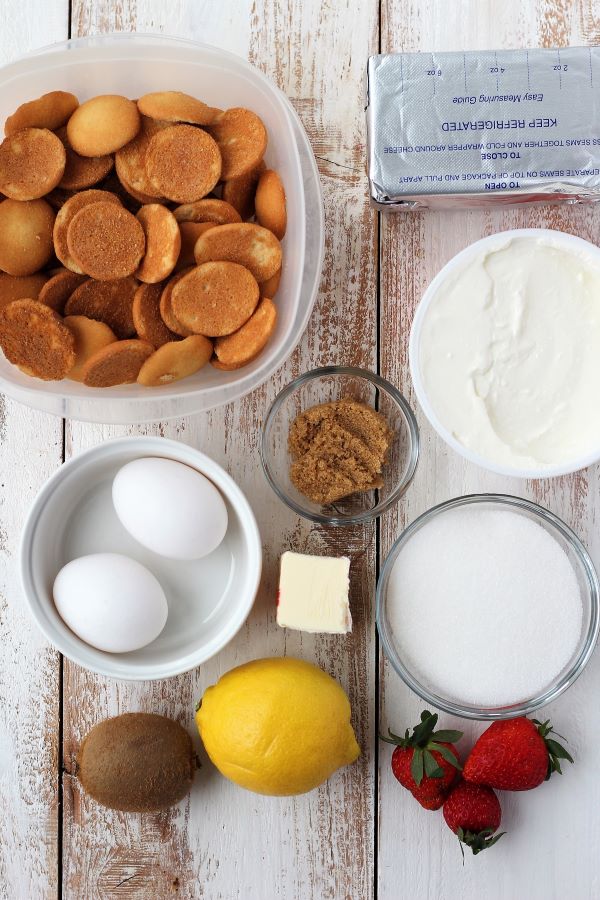
The crust is made of buttery Nilla wafers, love these little cookies! It’s important to use a food processor for this recipe. You’ll need it for the crust and the filling for best results. The filling is basically a dreamy cheesecake like texture, just not as thick of slices, or as dense. It pairs so wonderfully with the fruit. The combination of cream cheese and sour cream is just delightful!
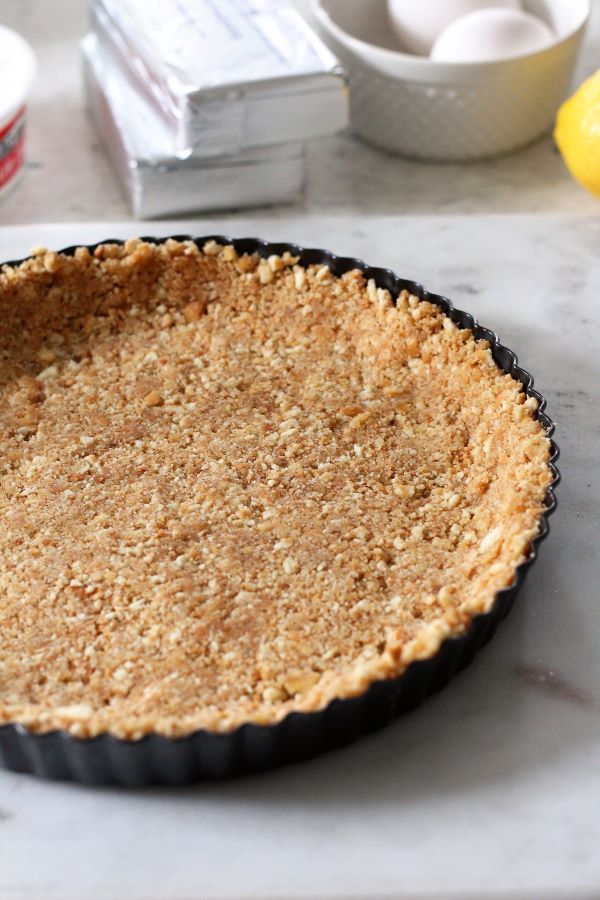
This recipe calls for a 9-inch tart pan and that is the only way I have made it. You could try a springform pan or a parchment lined square baking pan so that you can easily remove the tart from the pan with the parchment.
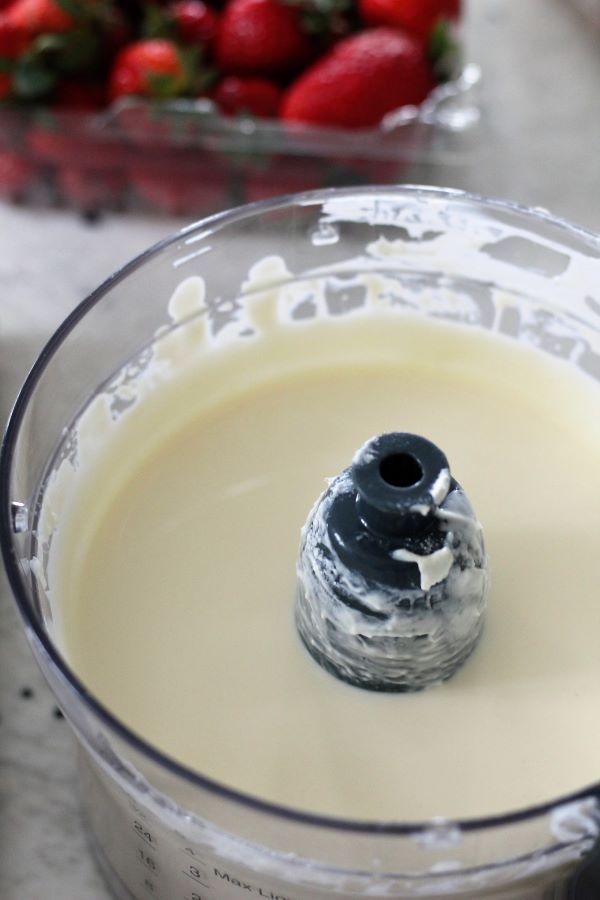
The filling is so smooth which is really key for a creamy tart, you don’t want any lumps! Room temperature cream cheese will also help get the smoothest filling.
Make sure to follow the cooling instructions. It’s important to cool the tart down slowly to avoid cracking. It’s also best after it has chilled for a few hours. This same tart can be topped with any fruit you like, or leave it plain and serve fruit on the side.
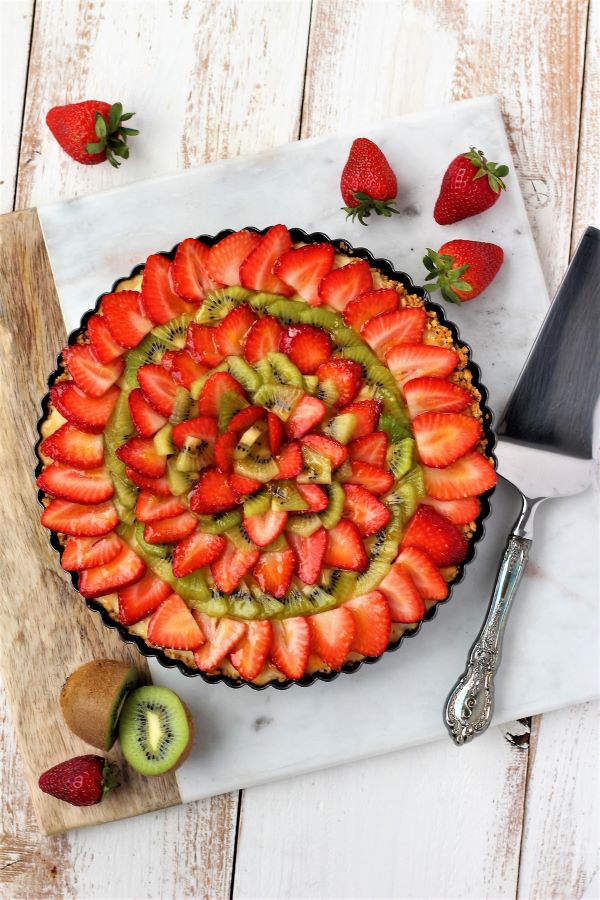
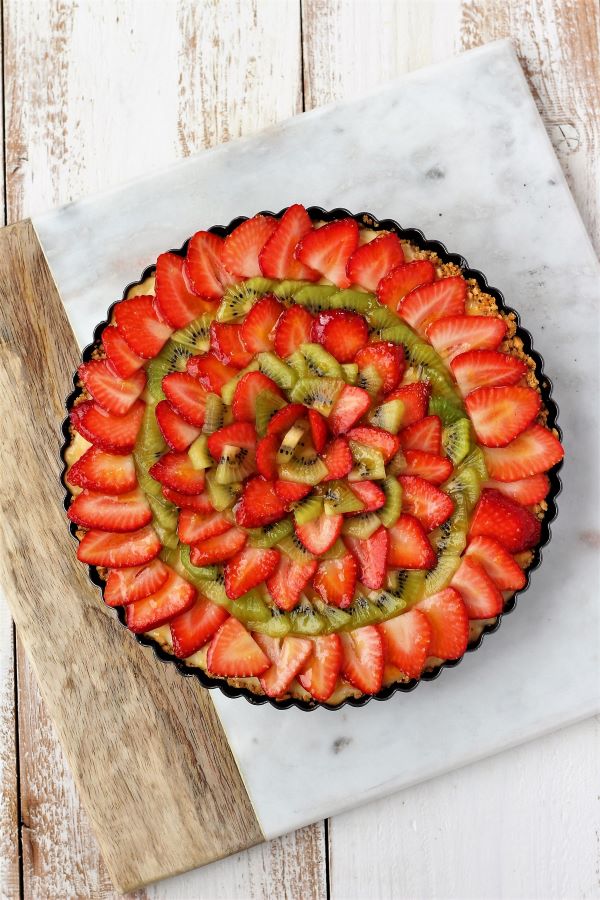
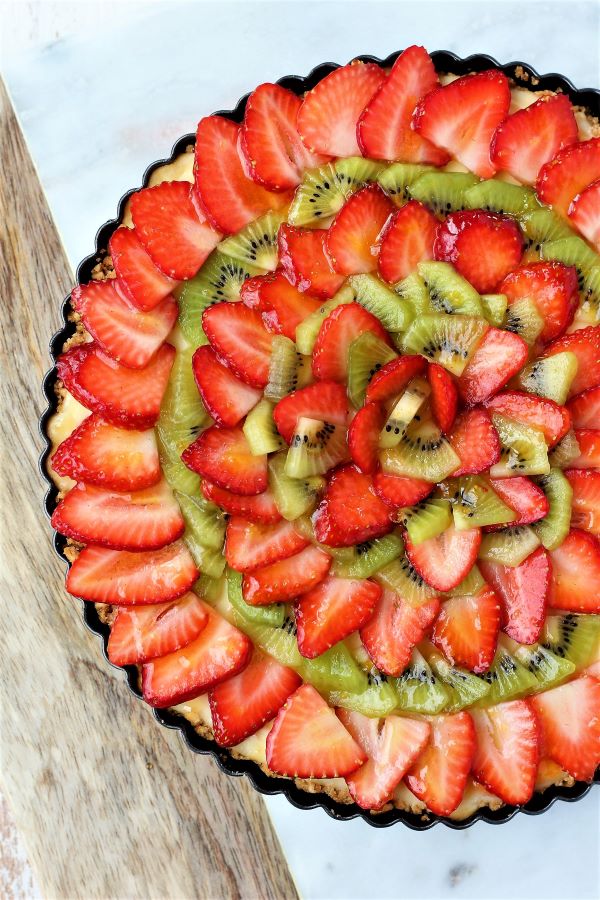
I thought the strawberry kiwi combo sounded delicious and perfect for spring, but I LOVE an assortment of fruit on my tarts.
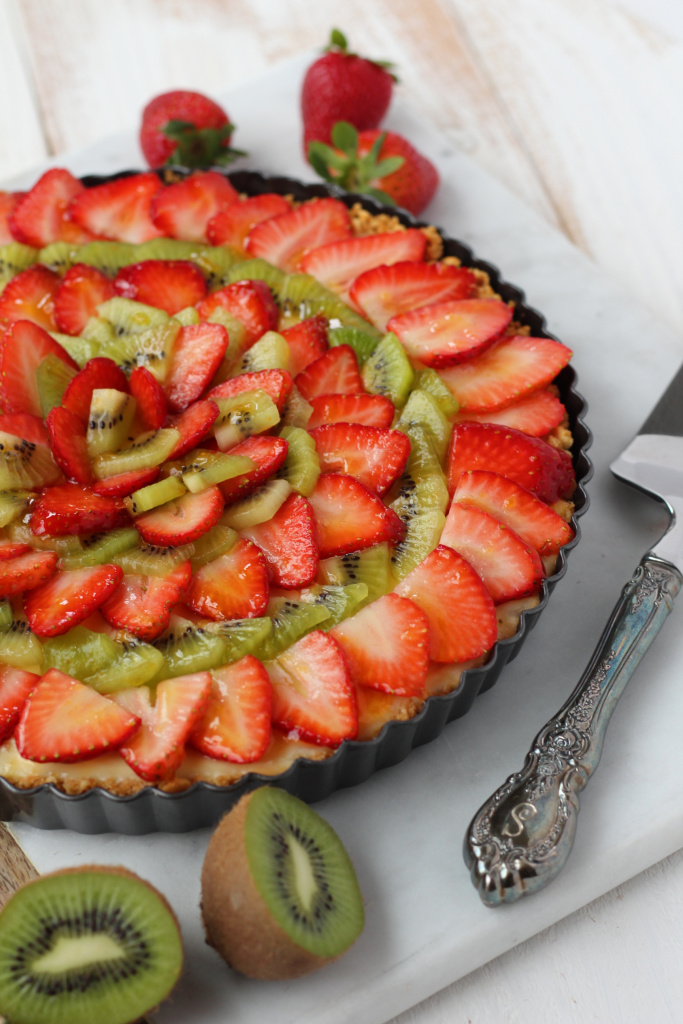
The top is brushed with apricot preserves, which is pretty traditional for fruit tarts. You can omit but I love the glossy finish it gives the tart.
Let me know if you make this Strawberry Kiwi Cream Cheese Tart by tagging me on social, or leaving a comment below! What will you top yours with?
Shop this post


This post may contain affiliate links which won’t change your price but will share some commission.
Strawberry Kiwi Cream Cheese Tart
The perfect spring or summer treat. It's like cheesecake…but better!
Ingredients
For the crust
- 5 oz Nilla wafers
- 2 tbsp brown sugar
- 4 tbsp unsalted butter melted
- Pinch of kosher salt
For the filling
- 1 pound full-fat cream cheese (2 8-oz packages) room temperature
- 1 cup sour cream
- 1/2 cup granulated sugar
- 2 large eggs
- 3 tbsp fresh lemon juice
- Sliced strawberries for topping
- Sliced kiwi for topping
- 1/4 cup apricot preserves
Instructions
-
Preheat oven to 325°.
-
In a food processor, pulse the Nilla wafers until you get a fine crumb (not powder). Transfer to a medium bowl and add in brown sugar, melted butter, and a pinch of kosher salt. Combine well with your hands until evenly coated. Press into an unlined 9-inch tart. Use the flat bottom of a measuring cup to really press down evenly all over. Bring the crust sides all the way up to the top of the tart pan edges. Bake for 10-12 minutes.
-
In a food processor, combine the cream cheese, sour cream, and sugar and process until super smooth. Scrape sides and pulse again. There should be no lumps. Add in eggs, lemon juice, and pinch of salt. Process again until super creamy and smooth, scrape down sides if needed and pulse more.
-
Pour the filling into the baked crust. Bake for 30-35 minutes, or until it no longer jiggles when tapped. It should not brown.
-
Turn the oven off, and leave the oven door open a crack. Let the tart sit in the off oven for 15 minutes before transferring to a wire cooling rack. Cool completely to room temperature.
-
Once cooled, arrange sliced strawberries and kiwi over the top of the tart. Add apricot preserves to a small bowl and microwave for a few seconds just to loosen it up (you don't want it too warm when brushing). Using a pastry brush, brush the preserves onto the fruit. Chill in refrigerator for at least 1-2 hours before serving.
-
Cover leftovers with plastic wrap, or store in an air tight container.
Recipe Notes
If you do not have a tart pan or springform pan, use a square or round baking pan lined with parchment with sides hanging over for easy removal. I linked the pan I use and love in the blog post.
Use any variety of fruits you like, or leave it plain and serve fruit on the side.

1 Comment